Be sure to check out Part I if you missed it.
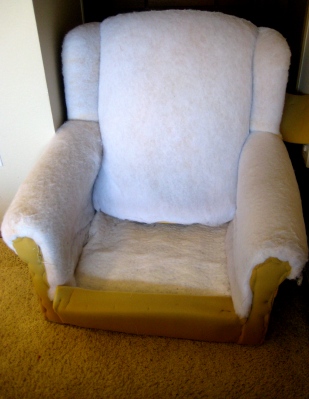
I’ve reached a major benchmark in my reupholstery project, about 5 weeks into the project. DIY projects take me a little longer with a 16-month-old running around the house. I’m so blessed to have a hubby who loves watching Hailey on his day off so I can have some extra hours for projects! Anyway, the benchmark I reached this week was to get every scrap of old upholstery off this chair.
As I said in Part I, The chair back and sides were lined with chipboard (kind of a dense cardboard). Feeling that this was not the sturdiest nor longest lasting solution for the chair, I researched in Singer Upholstery Basics Plus to find out what the professionals do. And the solution is: webbing. You know – the stuff that looks a little like seatbelts that is woven across chairs under the upholstered seat. So I researched some prices both on eBay and on upholsterystuff.com, and found that the latter had some great pricing both on the items and shipping/handling. So I ordered these supplies:
- Jute Webbing: The kind with a black line through it is for backs and arms, the kind with the red line has less give and is for seat support. I just needed the black line kind.
- Magnetic Tack Hammer
- Blued Tacks
- Upholstery Webbing Stretcher
Here is the chair back in much need of some nice jute webbing:
Meanwhile, I was off to find out if I had enough fabric for my project. I used this guide and found out I needed 5 yards of fabric for my particular chair. As an uneducated upholsterer I thought I could simply lay the old pieces on top of the new fabric and cut away. But luckily I decided to first look through my book for instructions. What I found was that I should chart out the yardage before cutting. Good thinking, and easier than laying everything out on the floor and drawing around it.
- I measured each piece of fabric as a rectangle, marking down the length and width at the longest and widest parts of the fabric. I did this by writing down each measurement by name of chair part (outside wing left, chair deck, chair back, etc) and then the measurement in length x width order. (My right and left measurements were exactly the same, but I made sure to write them twice so I wouldn’t forget them later.)

- I made a chart of my upholstery fabric yardage, on a 1/10th scale. I whipped this up in MS Word (which was easy in the publication mode), and it was fun! Like a little puzzle. So if the fabric was 32″L x 18″W, I made the rectangle in Word 3.2″L x 1.8″H. Here’s the finished product (I did not map out the welting, because I plan on using Sew Mama’s handy dandy technique to utilize leftovers to make the welting, or piping as she calls it). Click on the chart for a larger view:
So I think the answer is yes – I have the perfect amount of yardage for my chair! Now I need to harness my impatience and not cut corners as I cut the fabric…or I will get myself in trouble.


One Comment
This is looking super, Sarah. Once again, I am feeling inspired by your instructions and enthusiasm.