WE HAVE REDIRECTED OUR BLOG TO MOUSE + HINGE. PLEASE VISIT US THERE!
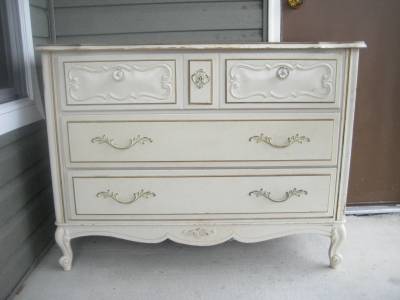
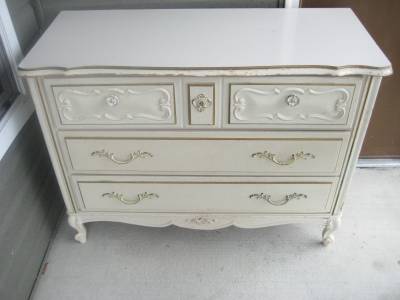
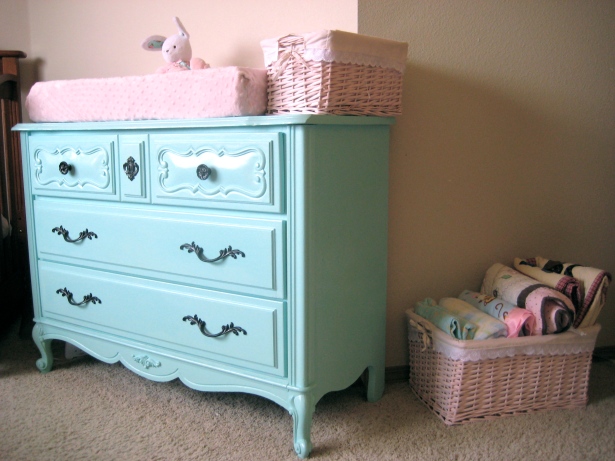
After looking around for the perfect dresser for Hailey’s room, I found this little tired out French Provincial dresser on Craigslist for $40 and immediately began picturing the possibilities.
I removed all the knobs and the crooked but elegantly curvy fake keyhole.
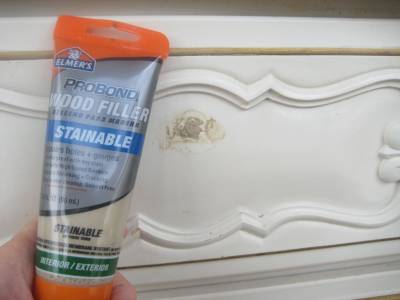
I am a perfectionist, but not a prepared perfectionist. Usually I bungle things up by not prepping, then later I’m sorry and have to backtrack and spend quadruple the time to fix the details I overlooked in the beginning. So I’m proud to say that I went to the trouble of fixing the off-center knobs on the top dresser drawer. They looked funny and made the drawer hard to open. I filled the holes with Elmer’s Wood Filler, let them dry, and sanded over the top of them. I also filled the other nicks and scratches on the top of the dresser, and lightly sanded a few spots with chipped paint.
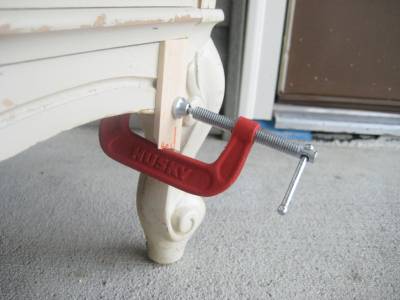
Part of the panel at the bottom had come unglued, so a bit of wood glue, a shim and a clamp did the trick.
My next step was to prime the piece with two coats of Zinsser’s Oil Based Primer, applied with mini-foam rollers. I sanded the primer with extra-fine sandpaper and a sanding sponge meant for sanding between coats. (Note: my preference is the sandpaper vs. the sanding sponge. The sponge is supposedly “washable”, but really only is effective after about 5 washes before it loses it’s grit. I had to wash it probably 10 times per project.)
When the primer was as smooth as I possibly thought it could be, I painted the piece with “Pooh’s Favorite Things” by Behr from Home Depot, again using mini-foam rollers and sanding between coats.
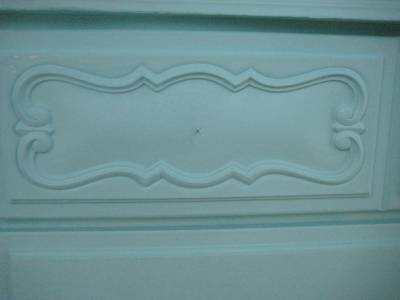
Now my knob holes had to be drilled, so I marked the center of the drawers by using an old artist’s trick (maybe carpenters do it too?). I angled a ruler from corner to corner, diagonally, and marked the center with a small line using a pencil. Then I angled the ruler the opposite way and marked the center again, creating an “X” in the middle of the drawer panel. I marked both sides.
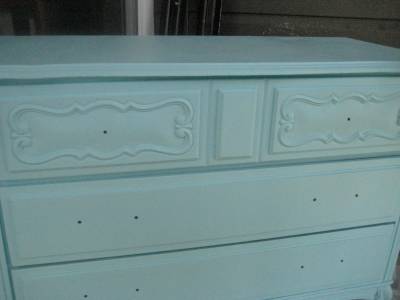
Using my small hand screwdriver and a drill bit, I drilled through the center of the drawers – and my eyes breathed a sigh of relief at the now centered knob holes. Now the dresser was ready for the finish. I used Minwax Gloss Wipe-On Poly for the finish. I pour the poly into a recycled container and use a torn old t-shirt to apply. I applied two coats.
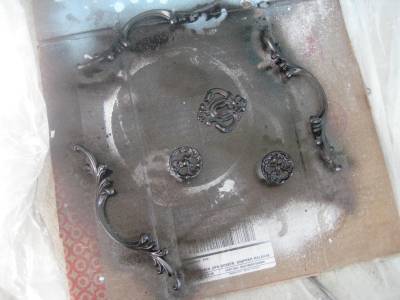
I painted the knobs with Rustoleum’s Oil Rubbed Bronze paint, which is all it is cracked up to be. Everyone is amazed that it is spray paint. (Yes, I tell my secrets. I can’t help being proud to be frugal.)
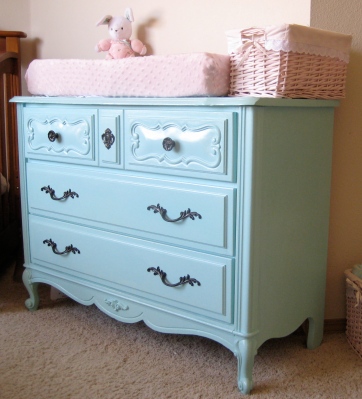
And finally, the finished product! After all the hard work, feeling like I’d never finish, and hating that we had dresser pieces scattered all over the porch of our apartment, I had to take in the lovely lines and curves that now look good enough to eat. So I must admit that for a week after it was done, several times during the day you could find me sitting on the rocking chair admiring the dresser.



45 Comments
This is unbelievably beautiful. wow.
Thanks so much Andie! What a good find, huh?
It looks lovely, Sarah~ I’m very impressed. Your and Anna’s blog has inspired me to pull out my sewing machine this summer and be creative. 🙂 Thank you for writing!
Fun, I didn’t know you liked to sew! Have you completed any projects yet?
I love quilting and am working on a new quilt. However, I’m trying to branch out so I’m trying my hand at altering some clothing items. I had an old cashmere sweater my grandma bought for me when I was like twelve and is obviously too small by now, but I can’t get rid of it! I cut it all up, re-sewed, and was able to make a little half-sweater thing that is still cute. My other attempts at similar projects did not turn out well, but I’m counting them as practice. 🙂 ha
Wow that’s super creative! I can’t believe you did that. I’ve heard of people cutting up and resewing sweaters but can’t picture it.
oooh!! I have the desk and lingerie chest that match this dresser. I was about to get rid of them but now I’m super excited to try painting them instead!
That’s great! If you do paint them, take before/after photos so we can post them on our blog as a guest post!
Stopping by from Remodolaholic party! I love how this dresser turned out! Looks wonderful in the room. I am also working on a french provincial set to sell. I do the same thing. I sit back and just stare at what I did for a few days before the feeling kind of wears off!!
Hi Bonnie! I’m glad I’m not the only one to be in awe of furniture transformations! I just took a look at yours as well – the dresser looks beautiful. Nice job!
Very beautiful! What a nice find. I love your color choice, it looks great with the pink in the room.
Thank you Calli!
I LOVE this. Thanks so much for writing such a great detail post on how to do this. 🙂
I’m glad you liked it Kim! I just checked out your blog too – very creative!
Stunning ! I’m very thankful for this post it gives me the impetus I need to do my bedroom set. Your dresser is amazing, lovely. I hope I can do it 🙂
thanks,
Thanks Elise! And good luck on your bedroom set!
Thank you, thank you, thank you for this tutorial. I just picked up a $35 6 drawer dresser that looks similar. I have to admit, I bought it mostly for the drawer handles (similar to yours.) I wasn’t sure what color I wanted to paint the handles, but now I know! ORB!
Quick question, did you use oil based paint for the Pooh’s corner color?
Brittany
http://www.prettyhandygirl.com
Brittany – I’m glad you liked the tutorial! I’ll keep an eye on your blog for your dresser handle redo – I hope you post it. 🙂 As for the paint – no, it was the cheapest flat paint, which became super resilient once I coated it with polyurethane.
-Sarah
Uau! (admiration exclamation in portuguese) 🙂 Great job!
First time in your blog and i just adore everything, i’m staying!
Kiss
http://codigodebirra.blogspot.com/
Carla – Muito obrigada! I’m glad you like the blog!
-Sarah
this dresser turned out great! I love that color…and in a nursery…swooon!
Thanks Nikki! I just checked your blog out as well – love it!
-Sarah
I was totally meant to see this post. I just inherited a dresser very similar to yours. It has those handles and that gold line. I want to paint it but am scared because it is NOT wood. Is yours made of wood?
Mine is only partially made of wood. There is some particle board with a veneer of some sort (on the sculpted parts). And the paint adhered just fine! If it is shiny, just scuff it up a bit with fine sandpaper, and be sure to prime it.
Only one word comes to mind…INSPIRING!! 🙂
Thanks for sharing your secrets too!
Thanks Jessica! I’m so glad you are inspired, that’s our goal. 🙂
I have a French provincial 3-drawer nightstand I got for $25 on Craigslist that I am going to do this to! I just have to decide what color, but I’m leaning towards spray-painting the hardware white to contrast with a rich dark color, or possible sunflower yellow.
I love having contrasting color on mine! The hardware makes a huge difference in the look.
WOW you did a great job. My question is, do you see brush strokes? I am inspired to paint some shabby chic dressers for my little girl’s room but was wondering if I should use spray paint to avoid seeing brush strokes. Also, did you say that you paint and then sand over the paint and then paint again? Why are you having to sand over the first layer and did you sand in spots or all over? Thanks for answering all of my questions. Your project looks GREAT. rkwallinger@yahoo.com
Thanks! I don’t have brush strokes – the sanding was to prevent that. But actually I just completed painting my second daughter’s dresser this week, and I used a mini foam roller, and painted on about 3 very thin layers without sanding. I don’t have any brush strokes there either, and that went a lot faster!
ok yes, i see you take the pieces off. sarah how the heck do you know what a shim is!?
Haha, I don’t even know where the heck I found that shim! I know I’ve never bought them…
Sarah, I’m inspired! I bought a tall dresser in the same style at a yard sale. It has a strange smooth, shiny white surface on the top, definitely not wood and not the same material as the rest. It’s almost like a counter top. Do you or anyone out there have a similar top? I am worried about how paint will stick to that in particular. Am also debating painting it white with gold accents or hot pink!
Sorry for the late reply! My new baby girl was born on the 3rd. I have both a desk and a nightstand with the same type of laminate top you are speaking of. With the nightstand, I sanded it down and primed with oil primer, then painted it and poly’d it. The paint has stuck well! The desk I’m thinking I will just leave the laminate white.
What would you suggest for the knobs/handles if they are glued on and can’t be removed. Do you think it will look okay to paint them the same color as the dresser?
Thanks!
I love the look of different tones, but you could try the same color, then change it if you don’t like it! My though is to use a fine paintbrush and handpaint the handles while they are glued to the dresser. More time-consuming than spraypaint, but I think it would work well.
I have a French Provincial dresser that I, too, would like to refinish. It’s very similar to yours. Do you think I would get similar results with spray paint?
Definitely! Have you seen those triggers you can buy for a spray paint can? That would really help you not get a frozen finger! Just keep your hand moving back and forth, and do lots of thin, even layers.
Do you have any idea where a person could find 5 of those beautiful drawer pulls!? I refinished the same dresser about a month ago. Then right before Christmas, I found a matching Chest of Drawers! It had ugly contemporary brass pulls on it. I have been unsuccessful in finding matching ones!
Debbie
BTW…I didn’t realize that the decorative legs and front panels were plastic when I started….ruined the panels and
had to improvise! I’m happy with it but, it’s not nearly as beautiful as yours!
I’m sorry I missed your comment! I would check ebay, you never know what you can find there! I’m sorry your panels were ruined – One of the dressers I refinished did have some plastic on it if I remember correctly!
Very impressive and tempting me to do something this summer!
So doing this! Couple questions. Did you sand between the two primer coats? Also, did you do all of this in one day?
I did sand between the primer coats. However, when I painted my second dresser, I just used a foam roller and did not need to sand between coats. NO I didn’t do it in one day! I would slip out to the front porch while my baby was in the living room watching a sign language movie, so I could watch her through the window as I worked. It was on the porch for a couple weeks I think. If you have more time than I did, you could accomplish it in two or three days, then let it dry for a few days before using.
Do you want to sell this piece?! 😉
Haha! Well I was thinking about it lately because my decor has changed quite a bit! But I think it’s still pretty cute in my third daughter’s room!