Be sure to check out Part I and Part II if you missed them.
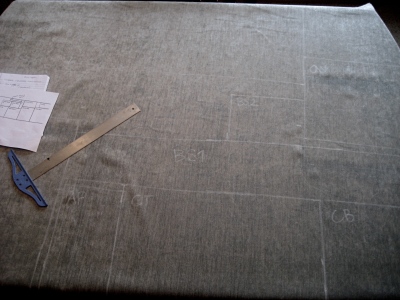
Slowly but surely I am making progress on my chair. Last week I put together a chart of my fabric, mapping out where each part of the chair would be cut from. This week I laid my fabric on the dining room table, printed out my chart, set out my measurements, and went to work. I used a piece of white chalk, a T-square, and measuring tape to mark off each part on the right side of the fabric. I also labeled the parts as I went so when they were cut I would know where they belonged. I remeasured each piece before cutting them, knowing that I could screw up my project big-time if I missed the measurements even by an inch.
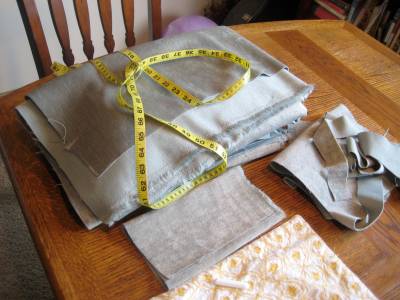
I have such satisfaction in my neat pile of cut fabric. I saved the scraps. Since I did not designate specific fabric for the welting, I’m hoping the scraps will be enough.
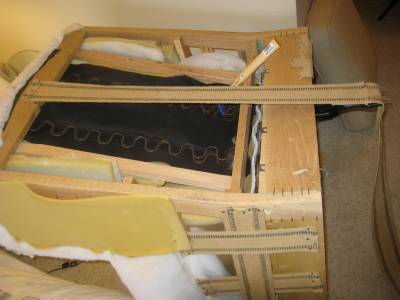
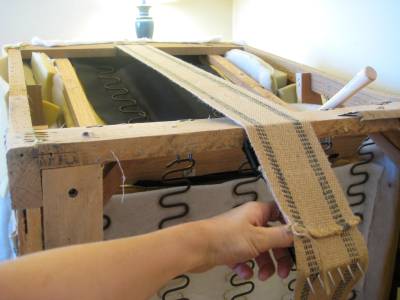
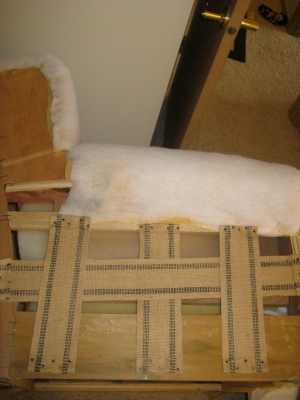
My webbing supplies arrived, so I was able to complete the webbing on the chair. I followed the instructions in my book:
- Mark the center of the wood bordering around the arms and back
- Decide on how many pieces of webbing are needed for the space
- Fold the webbing 1″ on the end, use 5 tacks to nail down .25″ from the end of the wood. Nail tacks in a zig-zag pattern on folded end.
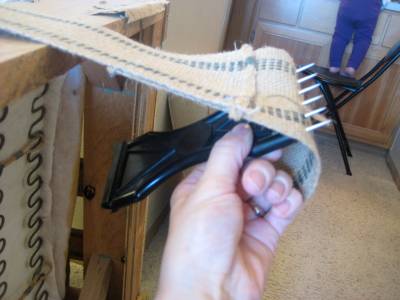
- Using a webbing stretcher tool (mine was only $7.95 on upholsterytools.com), place the groove on the edge of the wood for support, stick the spikes through the webbing, and pull down to make the webbing taut.
- Use 3 tacks to keep the webbing in place, then cut and fold over 1″ of webbing, nailing with 5 tacks as before.
- When crossing with more webbing, weave the webbing through. If there are more than one pieces of crossed webbing, alternate the weave to provide more stability.
I ran out of webbing (I bought 25 feet), otherwise I would have done one more cross-piece on the backing. I think it will be fine though. Doesn’t that look SO much better than cardboard??
UPDATE: In retrospect, I wish I would have waited to attach the webbing until all the base fabric was attached (the deck, the arms, the front). Now I have had to detach some in order to attach my fabric properly.
< How to Reupholster a Wingback Rocker, Part II How to Reupholster a Wingback Rocker, Part IV>>
